
Goal: Get ready for your company to launch its first-ever Facebook paid advertisements campaign.
Requirements or prerequisites: An individual Facebook paid advertisements account is required. Depending on the platform you are using, you can follow one of the blogs. If you do not yet have Google Tag Manager installed on your website. So you want to follow some of the portions of this recipe: WordPress, Squarespace, or Shopify.
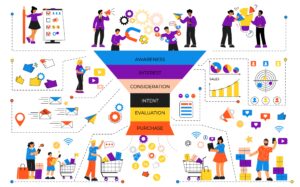
Why it is significant: You may advertise yourself to the 2 billion active Facebook users across the world with Facebook Ads.
When this is done: Typically only once per webpage.
Who does this? Possibly with assistance from the person in charge of website development, the person in charge of analytics or paid media.
Create a Facebook paid advertisements account
Step-1: Make a Facebook Ads account.

To view this blog, click here.
Result: Hence your payment method is already configured in your Facebook Business Manager account, which administers your Facebook paid Advertisements account.
Step-2 : Install the Facebook Pixel.

To access this Shopify blog, click here. To view the blog for non-Shopify sites, click here.
Result: Furthermore The Facebook Pixel has been correctly installed and tested.
Step-3 : Setting up Facebook Conversion Tracking

To view this blog, click here.
Result: Finally all of your key conversions are successfully being tracked, or at the very least, those conversions that will be significant for your next Facebook paid advertisements.
Special instructions: Although you only need to adhere to the blog’s parts that pertain to the conversion type you wish to configure.